本篇的个人网站搭建教程基于 GitHub + Hexo。
适宜人群:想要有自己说话的地方,没人干涉。
系统环境:win10
搭建正文:
1. 准备软件的安装
2. 注册github
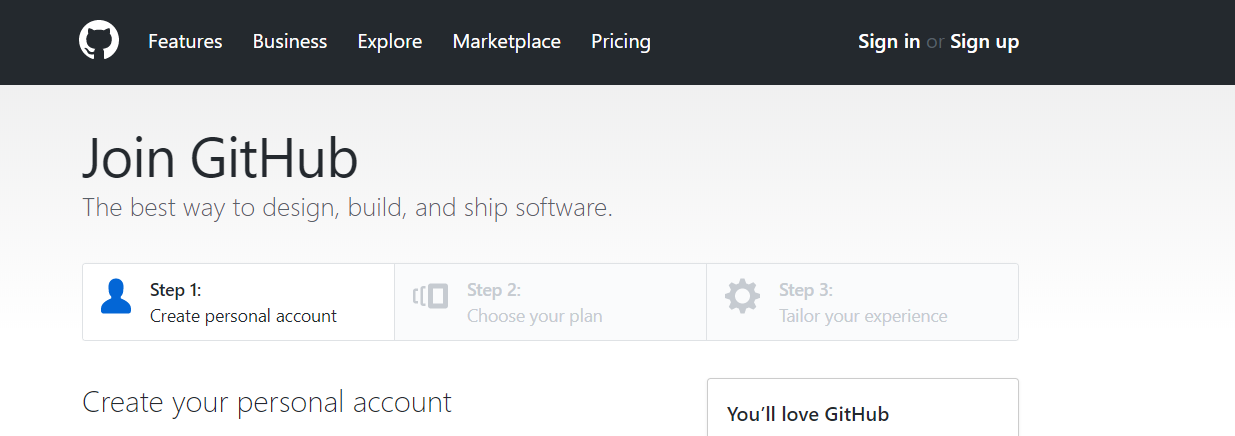
- 点击👉https://github.com右上角sign up

个人网站的网址是固定格式: username.github.io
这个username就是你的github用户名。当然也可以自己买域名啦。我的GitHub账号:YZHANG1270
个人网站:yzhang1270.github.io
但是我绑定域名啦~有个更酷炫的网址:codewithzhangyi.com,具体如何绑定将在后续篇介绍。
3. 创建Repository
登陆GitHub,点击右上角的 +号,选择New repository 创建一个与你的博客相关的Repository项目进行管理,之后所有你博客的动态都会在这Repository更新。
Repository的名字是username.github.io,比如我的yzhang1270.github.io已经创建。其余可以先不填,点击Create repository
4. 配置和使用Github
开始—所有应用—找到git bash
5. 配置SSH Keys
SSH Keys用来使本地git项目与GitHub联系,这样能在GitHub上的博客项目是最新更新的。
- 检查SSH Keys的设置
首先检查自己电脑上现有的SSH Key:1
$ cd ~/.ssh

如果显示 No such file or directory,说明这是你第一次用git
- 生成新的SSH Key:
1
2
3
$ ssh-keygen -t rsa -C "邮件地址@youremail.com"
Generating public/private rsa key pair.
Enter file in which to save the key (/Users/your_user_directory/.ssh/id_rsa):<回车就好>
这里的邮箱地址,输入注册 Github 的邮箱地址
然后系统会要你输入密码:1
2Enter passphrase (empty for no passphrase):<设置密码>
Enter same passphrase again:<再次输入密码>
再回车,这里会提示你输入一个密码,作为你提交项目时使用。
这个密码的作用就是在个人网站里所有的改动只能经过你的手,也可以不设置密码,直接为空。
注意:输入密码的时候没有输入痕迹的,不要以为什么也没有输入。
最后看到这样的界面,就成功设置ssh key了:
- 添加SSH Key到GitHub上
在本地文件夹找到id_rsa.pub文件,看上面的图片第四行的位置告诉你存在哪里了
没找到的勾选一下文件扩展名 隐藏的项目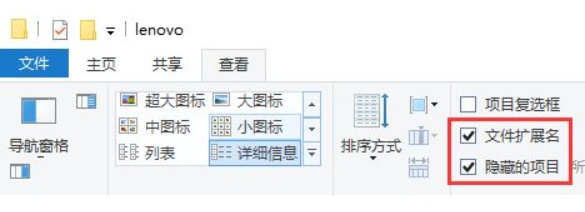

.ssh文件夹里记事本打开这个文件复制全部内容到github相应位置
回到你的GitHub主页,右上角点击头像选中Setting
继续选中左边菜单栏的SSH and GPG keys
Title最好写,随便写。网上有说不写title也有可能后期出现乱七八糟的错误
Key部分就是放刚才复制的内容了,点击Add SSH key
6. 测试
回到git bash 框里
输入以下代码,不要改任何一个字。1
$ ssh -T git@github.com
回车,看到如下:1
2
3The authenticity of host 'GitHub.com (207.97.227.239)' can't be established.
RSA key fingerprint is 16:27:ac:a5:76:28:2d:36:63:1b:56:4d:eb:df:a6:48.
Are you sure you want to continue connecting (yes/no)
输入yes回车1
Enter passphrase for key '/c/Users/Yi/.ssh/id_rsa':
输入刚才设置的密码回车,看到“You’ve successfully authenticated…”
成功!下一步!
7. 设置用户信息
现在已经可以通过 SSH 链接到 GitHub 啦!当然还需要完善一些个人信息:1
2$ git config --global user.name "yzhang1270" //输入注册时的username
$ git config --global user.email "yzhang1270@gmail.com" //填写注册邮箱
GitHub 也是用这些信息来做权限的处理,输入下面的代码进行个人信息的设置,把名称和邮箱替换成你自己的。
到此,SSH Key配置成功啦!😀
本机本机已成功连接到 github。
如有问题,请重新设置。常见错误请参考:
Connecting to GitHub with SSH
Error: Permission denied
9. 搭建Hexo博客
利用npm命令安装hexo1
2$ cd
$ npm install -g hexo
- 创建独立博客项目文件夹
安装完成后,关掉之前的Git Bash窗口。在本地创建一个与 Repository中博客项目同名的文件夹username.github.io(如D:/yzhang1270.github.io)在文件夹上点击鼠标右键,选择 Git bash here(搞的我现在每次要写文章的时候脑子里冒出的第一句话永远是Bash Here!)
【提示】在进行博客搭建工作时,每次使用命令都要在D:/yzhang1270.github.io目录下。
执行下面的指令,Hexo 就会自动在 D:/yzhang1270.github.io 文件夹建立独立博客所需要的所有文件啦!1
$ hexo init
安装依赖包
1
$ npm install
确保git部署
1
$ npm install hexo-deployer-git --save
本地查看
恭喜你!👏现在已经搭建好本地的 Hexo 博客了,执行完下面的命令就可以到浏览器输入 localhost:4000 查看到啦!1
2$ hexo g
$ hexo s
hexo g 每次进行相应改动都要hexo g 生成一下
hexo s 启动服务预览
- 用Hexo克隆主题
执行完 hexo init 命令后会给一个默认的主题:landscape
里面还有一篇写好的示例文章:Hello World
你也可以到官网你喜欢的主题进行下载:hexo themes
知乎:有哪些好看的 Hexo 主题?
找到之后通过git命令下载
界面右侧,在主题的repository点击clone 复制一下那个地址
1
$ git clone +复制的地址+themes/typing
后面就是clone之后放到你本地的博客文件夹themes文件夹下
后面还可以将自己博客个性化装饰~
- 修改整站配置文件
自己把blog.io中文件都点开看一遍,主要配置文件是 _config.yml,推荐使用 nodepad++ 打开。
修订清单如下,文档内有详细注释,可按注释逐个修订
(1)博客名字及作者信息:_config.yml
(2)个人介绍页面:about.md
1 | 这里贴一份网上看到的 可以复制替换原来的 但是替换之前最好备份 可能会出错 |
- 启用新下载的主题
在刚打开的的_config.yml 文件中,找到“# Extensions”,把默认主题 landscape 修改为刚刚下载下来的主题名:
【提示】username.github.io 里有两个 config.yml 文件,一个在根目录,一个在 theme 下,现在修改的是在根目录下的。
更新主题
git bash 里执行1
2$ cd themes/主题名
$ git pull本地查看调试
每次修改都要hexo g 生成一下1
2$ hexo g #生成
$ hexo s #启动本地服务,进行文章预览调试,退出服务用Ctrl+c
浏览器输入 localhost:4000 预览效果
10. 将博客部署到username.github.io
- 复制SSH码
进入 Github 个人主页中的 Repository,复制新建的独立博客项目username.github.io的 SSH码
编辑整站配置文件
打开 D:/username.github.io/_config.yml,把刚刚复制的 SSH码粘贴到repository:后面,别忘了冒号后要空一格。1
2
3
4deploy:
type: git
repository: git@github.com:username/username.github.io.git
branch: master执行下列指令即可完成部署
【提示】每次修改本地文件后,需要 hexo g 才能保存。每次使用命令时,都要在你的博客文件夹目录下:
在D:/username.github.io/ 右键打开 Git Bash Here1
2
3
4# 黄金三命令
$ hexo g //(g = generate 修改生产)
$ hexo s //(s = server 修改预览)
$ hexo d //(d = deploy 修改部署)
【提示】如果在配置 SSH key 时设置了密码,执行 hexo d 命令上传文件时需要输入密码进行确认,会出现一个小框框。
输入密码之后在浏览器输入:username.github.io
Surprise🎉!恭喜你~
你已经拥有一个属于你自己的个人网站啦~嘿嘿
11. 写博客啦!
内涵才是重点!
在D:\username.github.io\source_posts的空白处右键Git Bash Here1
hexo new 'article'
此时已经在D:\username.github.io\source_posts目录下有一个 article.md的Markdown文件
Hexo的博客都是用Markdown写的。我就随便写了点试试我的新博客啦~~
写博文参考:如何写一篇hexo博客
搭建参考:
其他参考:
如果搭建成功了~欢迎打赏哈哈哈~🤑
我的文章将持续更新在我的 codewithzhangyi.com ( = yzhang1270.github.io) 里
任何疑问请在下方留言,也将在下一期教如何制作留言板~
敬请期待~❤
